Followers

Powered by Blogger.
Showing posts with label MY DIY. Show all posts
Monday, November 7, 2011

Versace inspired bracelet DIY

 Gold and chains are the perfect ingredients for a luxury bracelet. I istantly loved the bracelet designed by Donatella Versace for H&M and while we wait for the collection to finally reach the stores, why don't make our version of it? You only need gold chains, a wide clasp and a big button!

L'oro o almeno il dorato è l'ingrediente indispensabile per un gioiello che abbia un aspetto lussuoso. Tra gli accessori disegnati da Donatella Versace per il marchio H&M uno in particolare mi ha colpito subito ed è il bracciale con le catenelle. Mentre aspettiamo che finalmente la collezione venga distribuita nei negozi ecco un tutorial veloce che reinterpreta il braccialetto. Vi servono: catenelle, una chiusura e un bottone e il bracciale è presto fatto.


the inspiration:Versace fo H&M
 il bracciale Versace for H&M
 
Aren't buttons beautiful? They can make incredible jewellery almost on their own. I found this big gold button at the haberdashery, you can choose any button you like.The variety is almost infinite and you'll be tempted to buy them all.
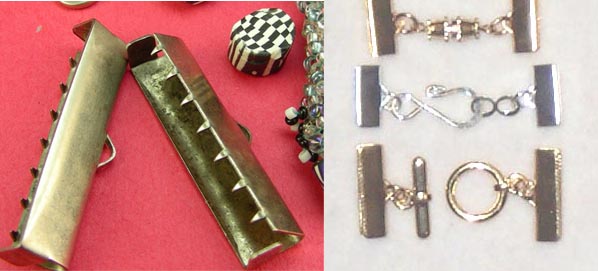
Here's the list of supply needed: a piece of metallic wire, a gold chain ,a button, a clasp like the ones you see below. They are pretty common but my local shop didn't have it so I had to diy my own with a metallic cap.

I bottoni sono davvero bellissimi e possono diventare dei gioielli unici. Io ho acquistato questo grande bottone dorato, voi scegliete quello che più preferite. La scelta è davvero molto ampia e una volta entrate in merceria sarete tentate di comprarli tutti!
Prendete: un filo metallico, una catenella dorata, un bottone, una chiusura per bracciale come quelle che vedete qui sotto. Il mio negozio di riferimento le aveva finite quindi ho dovuto "fabbricare" la mia con un un tappo di lamiera.

I just laid down the chain and tried the button on: as you can see the bracelet looks already done.
Measure your wrist and cut the chain in pieces of the same lenght; then attach the botton at the center with a piece of metallic wire. Using the pincher press the clasp at the ends to block the chains and you've done!

Ho sistemato la catena sul tavolo e ci ho poggiato sopra il bottone. Come potete vedere il bracciale sembra già fatto! Misurate il polso e tagliate la catenella in pezzi della stessa lunghezza. Legate il bottone alla catenella con un pezzo di filo metallico. Inserite la chiusura e schiacciatelasulle catenella. Avete finito!


what i did to make the clasp: I cut 2 rectangular pieces from the cap then I pierced it using a nail. I used a hook  to connect the chain to the metallic plate an then i pressed it down using a pincher.
Come ho fatto a far la chiusura? Ho ritagliato due rettangoli dal tappo e li ho bucati usando un chiodo. Con dei gancetti ho connesso la lamiera alle catenelle e ho poi schiacciato la lamiera con la pinza.

Saturday, October 29, 2011

Cut out shirt tutorial


Here's the shirt tutorial. I took a real man shirt and then I pinched and pinned it around the waist to make it more fitted. You can choose any shirt and then follow the 3 steps to cut it out.

Come promesso ecco il tutorial per realizzare la camicia con inserti in tulle. Io ho traformato una vera camicia da uomo e ho creato due pence sul davanti per renderla più avvitata. Voi scegliete la camicia che più preferite e seguite i 3 step per trasformarla.


Wear you shirt and mark out with a pin where you want the see throught part to begin. Lay down your shirt and make a loose stitched  line that will help you to cut straight.

Indossate la camicia e appuntate uno spillo sul davanti per segnare il punto da cui iniziare a tagliare. Partendo da lì fate un'impuntura da parte a parte che vi aiuterà a tagliare dritto.

 Cut the shirt : start from the front, go around the shoulder and down to the botton line. Leave 1 cm of fabric around the edge and then fold that edge to obtain a neat border.

Tagliate la camicia: cominciate dal davanti, proseguite intorno alla spalla e poi tornate giù intorno la linea dei bottoni. Ricordatevi di lasciare un 1 cm di stoffa intorno all'area tagliata. In un secondo momento piegate quel bordo ottenendo così un orlo ben rifinito.


Reverse the shirt.
Take your light weighted tulle and pin it over the edge of the cut part.
The good thing is that you don't need any pattern, just pin the tulle on and pay attention that the tulle is well stretched out.
Now sew the tulle on the shirt, cut the excess tulle around the edge and you've done!


Mettete la camicia a rovescio.
Prendete un tulle molto leggero e appuntatelo con degli spilli sulla parte tagliata.
Non vi servirà alcun modello fate solo attenzione che il tulle sia ben steso così non farà pieghe.
Cucite il tulle sulla camicia e tagliate quello  in eccesso ai bordi e avete finito!
Friday, October 28, 2011

Man shirt makeover


Many winter looks are inspired by men style. What better than a classic man shirt to jump on seasonal trends? I spent this week examining minutely this piece of wardrobe and at the end I couldn't resist giving  it my own twist. There are many beautiful details in a man shirt: the stiff collar and cuffs,the button line so I thought it would be cool to emphasize these details and make them pop out of the shirt.  I cut out a piece from the front of the shirt and I subsituted it with a very light weighted tulle. I think I obtained a masculine look with a feminine twist, what do you think of the result? Tomorrow the tutorial!

Read the Cut out shirt tutorial now


La moda invernale si ispira al guardaroba maschile. E come non scegliere una camicia classica per interpretare il trend di stagione? Tanti sono i dettagli che rendono speciale la camicia : il colletto rigido, il bordo con i bottoni allora perchè non metterli in evidenza e farli risaltare? Ho ritagliato parte della camicia e ho sostituito il cotone con del tulle leggerissimo ottenendo così un effetto trasparenza che rende il look si androgino ma con un twist femminile. Che ne pensate? Tornate domani per il tutorial!
Saturday, October 22, 2011

Versace inspired jeans DIY

DIY jeans
white altered blouse (a diy in progress)

I've been dreaming about a micro studded cloth for a while but the idea of inserting each mini stud by hand was just unrealizable until I found these "beads in a bottle" (doesn't it sound like something came out from Wonderland?). It's a gummy product you can squeeze onto fabric and that makes a ball that looks like a bead.  I found my "micro studding machine"! I picked the metal colors series and I started "to stud" a pair of black jeans. The inspiration is Versace. I decorated them around the lateral seam with the greek fret then I added a spiral on the front.

Ho sempre desiderato possedere un abito decorato con mini borchie ma l'idea di applicarle manualmente una ad una era semplicemente non realizzabile fino a quando ho trovato una ragionevole alternativa: perline in bottiglia (dal nome sembra un oggetto proveniente dal paese delle meraviglie). E' un prodotto viscoso che può essere applicato sulla stoffa e forma una pallina dall'aspetto di una perlina: una perfetta "macchina borchiatrice"! Ho scelto il prodotto in colori metallici affinchè la perlina sembrasse una borchia. L'ispirazione è Versace, ho decorato i pantaloni con una greca intorno alla cucitura laterale e ho aggiunto dei decori sul davanti.


a life size view of the pattern I drew, the grid step is 1 cm wide
il disegno della greca, il quadretto è largo 1 cm
I drew the pattern onto the trousers with a chalk
ho disegnato la greca sul pantalone con un gessetto
the studding machine gun is armed
 la "borchiatrice" armata e carica
 the first studs
le prime borchie
the spiral: finished and dried
la spirale finita ed asciutta

If you want to decorate smaller areas rhinestuds are a good alternative to "beads in a bottle". They are small metallic studs that can be ironed onto the fabric, you can buy ready to use decorations or loose ones.

Se volete decorare aree più piccole le borchiette piatte sono una valida alternativa alle "perline in bottiglia" . Si incollano sulla stoffa stirandole e si possono acquistare in merceria interi decori già pronti o sfuse.

A special thanks to Beth Livesay and Stampington for sending me a bag full of these special beads for my fashion experiments. Visit Beth's blog: Couture over Coffee

Un ringraziamento particolare a Beth Livesay e a Stampington per avermi mandato un pacchetto pieno di "perline in bottiglia" per i miei esperimenti di moda. Visitate il blog di Beth: Couture over Coffee.

my stock of liquid beads, still plenty left for my future projects
Saturday, October 15, 2011

Versace nails DIY


Today my manicure is inspired by Versace. I firsty applied a mint green base and then I decorated it with a bronze color (it's a little sparkly and glittery). I made the decorations using a pin (yes for sewing). I dip it into the bronze color and I drawn the greek fret. I added a few dots on top to look like mini studs. Do you like it?

La manicure di oggi è ispirata a Versace. Ho applicato un primo strato di verde menta che ho poi decorato con un color bronzo leggermente luccicante. Per fare le decorazioni ho utilizzato uno spillo imbevuto nello smalto. Ho disegnato la greca e ho poi aggiunto dei piccoli pois al di sopra di essa come fossero delle micro borchie.
Friday, October 14, 2011

Aviator sunglasses DIY tutorial


Here's the aviator sunglasses tutorial. I hope you'll like it!
Ecco a voi il tutorial su come realizzare gli occhiali, spero vi piaccia!


Let's start with the supply needed:
  • a pair of aviators
  • white leather (surprisely I found the right leather in a belt! I know it may sound cruel but I had to cut it out! )
  • metallic wire
  • glue
Cosa ci serve?
  • un paio di occhiali
  • della pelle bianca (io l'ho ricavata da una cinta!)
  • filo metallico
  • colla


Let's make the pattern. Take a piece of paper and press it along the edge of your glasses, you'll obtain an imprint of their shape.

Per fare il modello: prendete un foglio di carta e premetelo lungo il profilo laterale degli occhiali, noterete che la curvatura degli occhiali rimarrà impressa.

This is the right curvature, it will ensure a good fit around the glasses. Trace it and close the shape(it looks like a sail) you can use the shape I drew for reference.
Pin the pattern over the leather and cut it out a little bigger than your pattern.
Hem it.
I have handquilted my shape (unfortunately my sewing machine can't sew leather!)but this step is optional.

La giusta curvatura vi garantirà una corretta adesione all'occhiale. Ricalcate con una penna la parte curva e chiudete la forma, usate il mio modello come riferimento. Appuntate il modello sulla pelle e ritagliatela, appena più grande della forma di carta e fategli l'orlo.
Io ho decorato la forma con una trapuntatura a mano ma questo step può essere tranquillamente saltato.


Now the big question: how can we keep in shape the sail? And the answer takes us to the fun part. Take a metallic wire and insert it into the hem of your shape. Now shape the piece of leather around the glasses.

Ora la domanda è: come far mantenere la forma al pezzo in pelle? La risposta ci porta alla parte divertente del tutorial. Prendete un filo metallico e infilatelo nell'orlo appena fatto. Ora potete dare la corretta forma alla "vela".
Now the project is almost over. Take your shaped sails and glue them onto the sidepart of the sunglasses in one point. In order to cover the glue, cut a small piece of leather (it can be any shape, I chose the first letter of my name to make it more customized but you can choose to glue a nice button too)  and glue it where the glue is showing and you've done!

A questo punto avete quasi finito. Incollate la forma sulla stanghetta degli occhiali in un punto. Tagliate un altro pezzetto di pelle e incollatelo nel punto di incollaggio per evitare di mostrare la colla (potete ritagliare la vostra iniziale o qualunque altra forma, oppure incollarci un bottone!) e gli occhiali sono pronti!
Thursday, October 13, 2011

Aviator sunglasses DIY


I finally found a nice white leather to customize my mirror aviators!Want a pair? I'll post the tutorial tomorrow! Have a nice day guys!
Saturday, October 8, 2011

Missoni nails DIY


 Just for fun I tried to do a zig zag manicure today. I applied a base coat and then I drew little V in different colors with a metallic tip obtaining the zig zag decors. This is the first experiment, I found out that an older nail polish, more dense than newer ones allows to draw a more accurate zig zag but it will make a thicker layer so it takes longer to dry. I still haven't tested nail art pens,maybe they could be helpful for intricate decorations, what do you say? Have tried them yet? What do you think of the result?  

La manicure di oggi si ispira alle stampe di Missoni e all'iconico motivo a zig zag. Ho applicato un primo strato di smalto come base e poi ho disegnato delle piccole V in colori diversi con una punta metallica ottenendo il motivo a zig zag . Uno smalto che avete da un po',quindi un po' denso vi permetterà di ottenere più facilmente delle striscie precise ma impiegherà più tempo per asciugarsi. Già da un po' nei negozi si trovano degli smalti in  pennarello per facilitare la decorazione delle unghie,questo è uno di quei casi in cui potrebbero essere utili, voi che ne dite? Li avete già testati?  Che ne dite del risultato?
Saturday, October 1, 2011

Iconic jewellery holder DIY


How many times you asked yourself: what would she wear? Anyone has an icon whose style inspires us so I thought: why don't let her wear our jewellery? This is how the idea of this jewellery holder was born.
If you like it and want to make one yourself then follow me.

Quante volte ci siamo chieste: lei cosa indosserebbe? Tutte noi abbiamo un'icona il cui stile ci ispira, perchè non materializzarla nel nostro appartamento e farle indossare i nostri gioielli così da creare un portagioielli utile che arredi? Se vi piace e volete sapere come realizzarne uno allora seguitemi.


Print your icon: choose a pic of your muse and print it big onto a piece of carboard
Stampa la tua icona: scegli una foto della tua musa e stampala su un cartoncino


 Cut out the icon
Ritaglia la sagoma


Place the shape onto a piece of pressed cardboard and trace the contour
Sovrapponi alla sagoma ad un foglio di cartone pressato e traccia il contorno


Cut a rectangular piece of pressed cardboard, this will enable the shape to stand tall.
Cut a piece of gros grain longer than the rectangular piece (15-20 cms longer) and glue it at its centre

Tagliate una forma rettangolare dal cartone pressato, servirà a mantenere l'icona in piedi
tagliate un pezzo di gros grain più lungo del rettangolo di 15 cm e incollatelo sul rettangolo

Paint the back of the pressed cardboard
Glue the rectanguar piece at the back of the pressed cardboard
glue the gros grain at the front of your shape
It's just like a frame
now it's time to glue the printed icon onto the shape and you've done

Dipingete il retro della sagoma e incollateci il rettangolo
ora incollate l'altra l'estremità del gros grain sul davanti della sagoma
è come una cornice!
Incollate ora il poster dell'icona sul davanti della sagoma, è fatta!


Now pierce the icon image wherever you want and place your jewellery into these holes
Your new jewellery holder is ready!


Con una puntina bucate la sagoma dove volete e infilateci i vostri gioielli, il vostro nuovo porta gioielli è pronto!


Here's the iconic jewellery holder packed and ready to make a little gift for my favorite cousin!
Ed ecco il portagioielli incartato e pronto per essere donato alla mia cuginetta preferita!
Sunday, September 25, 2011

What if sidereal space was a jewel?


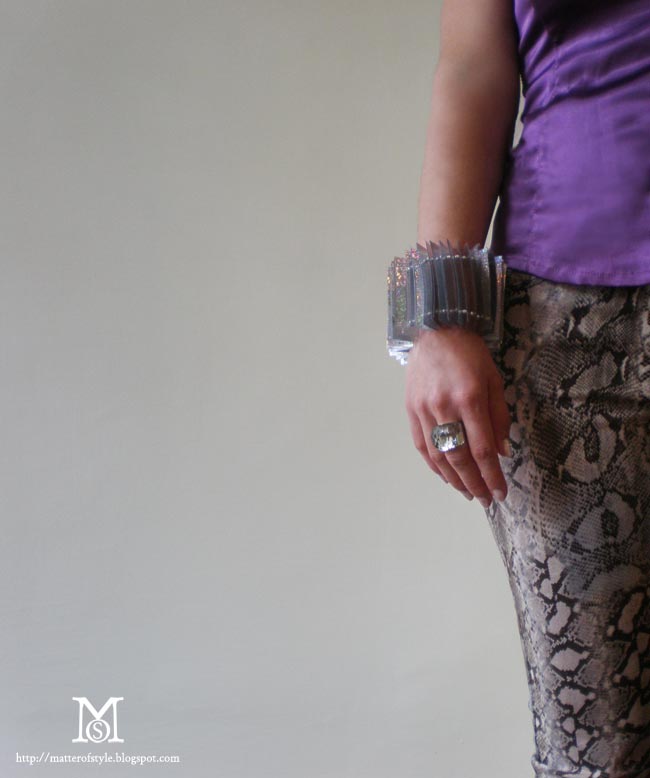
The diamond is something perfect both for its brightness and cut. The necklace was born to emphasize the shape of a diamond, a stone bright as the stars. It is set at the centre with four mirrors reflecting its light around the space. They give a tridimensional dimension to the necklace and they look a little bit like solar panels.
The inspiration is both the sidereal space and the future. The bracelet is obtained with the repetition of a simple shape and it reflects all the rainbow colors when explose to the light.
What do you think of the result?


Il diamante è la perfezione: per lucentezza e taglio. La collana nasce con l'idea di dare risalto alla forma del diamante,una pietra luminosa come le stelle. E' posto al centro della collana con quattro specchi che ne riflettono la luce. Danno tridimensionalità alla struttura e l'aspetto di un satellite. L'ispirazione è sia lo spazio profondo che il futuro. Il bracciale è ottenuto come ripetizione di un elemento base e riflette i colori dell'arcobaleno quando è esposto alla luce. Che ne pensate?


the inspiration: satellites, shiny stars, the future,diamonds
Related Posts Plugin for WordPress, Blogger...

Popular Posts

Total Pageviews

My Zimbio My Ping in TotalPing.com

About Me

My Photo
Youth Pangkahkulon
View my complete profile