Followers

Powered by Blogger.
Showing posts with label DIY. Show all posts
Tuesday, November 15, 2011

DIY idea: the fox scarf


from left via etsy : fox scarf in felt;   knitted scarf

Fur collars and fox stoles has been in the past symbols of elegance. Nowadays we choose to wear less expensive but still beautiful faux furs leaving animals happily floric in the countryside. If you still feel the urge to wear a fox around your neck why not wear one of the foxes above?
They're funny and make a statement accessories for the fearless fashionista. They can make even wonderful christmas gifts for your friends so start knitting.

 Colli di pelliccia e stole di volpe sono stati sicuramente in passato simboli d'eleganza. Oggi scegliamo di indossare pelliccie ecologie, meno costose ma altrettanto belle lasciando gli animali liberi di scorazzare per la campagna. Se sentite ancora la necessità di indossare una stola di volpe intorno al collo perchè non provare una di quelle che oggi vi propongo? Un accessorio divertente per colei che non ha paura di osare. Potreste realizzare queste divertenti sciarpe anche per le vostre amiche e regalarle per Natale.
Friday, November 11, 2011

DIY idea: pleats


Pleated skirts are back in fashion and since Donatella Versace included them in her collection for H&M they went right in my diy list. A pleated skirts should be not too difficult to make and I hope to be back to you soon with a tutorial to diy a pleated skirt and be party season ready!

Le gonne a pieghe sono tornate di moda e da quando Donatella Versace le ha incluse nella sua collezione per H&M sono finite nella mia lista dei modelli da realizzare. Spero di potervi presto aggiornare con un tutorial per realizzare una gonna a pieghe da sfoggiare sotto le feste natalizie.
Monday, November 7, 2011

Versace inspired bracelet DIY

 Gold and chains are the perfect ingredients for a luxury bracelet. I istantly loved the bracelet designed by Donatella Versace for H&M and while we wait for the collection to finally reach the stores, why don't make our version of it? You only need gold chains, a wide clasp and a big button!

L'oro o almeno il dorato è l'ingrediente indispensabile per un gioiello che abbia un aspetto lussuoso. Tra gli accessori disegnati da Donatella Versace per il marchio H&M uno in particolare mi ha colpito subito ed è il bracciale con le catenelle. Mentre aspettiamo che finalmente la collezione venga distribuita nei negozi ecco un tutorial veloce che reinterpreta il braccialetto. Vi servono: catenelle, una chiusura e un bottone e il bracciale è presto fatto.


the inspiration:Versace fo H&M
 il bracciale Versace for H&M
 
Aren't buttons beautiful? They can make incredible jewellery almost on their own. I found this big gold button at the haberdashery, you can choose any button you like.The variety is almost infinite and you'll be tempted to buy them all.
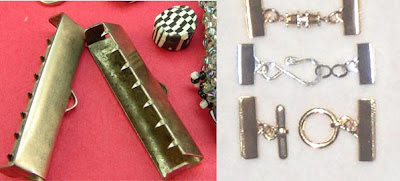
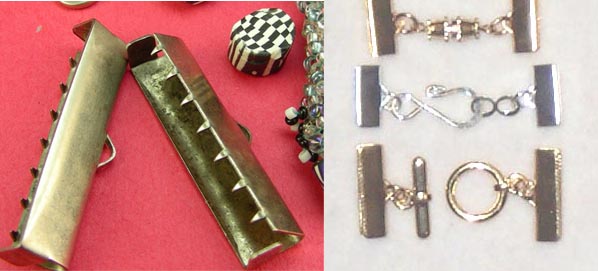
Here's the list of supply needed: a piece of metallic wire, a gold chain ,a button, a clasp like the ones you see below. They are pretty common but my local shop didn't have it so I had to diy my own with a metallic cap.

I bottoni sono davvero bellissimi e possono diventare dei gioielli unici. Io ho acquistato questo grande bottone dorato, voi scegliete quello che più preferite. La scelta è davvero molto ampia e una volta entrate in merceria sarete tentate di comprarli tutti!
Prendete: un filo metallico, una catenella dorata, un bottone, una chiusura per bracciale come quelle che vedete qui sotto. Il mio negozio di riferimento le aveva finite quindi ho dovuto "fabbricare" la mia con un un tappo di lamiera.


I just laid down the chain and tried the button on: as you can see the bracelet looks already done.
Measure your wrist and cut the chain in pieces of the same lenght; then attach the botton at the center with a piece of metallic wire. Using the pincher press the clasp at the ends to block the chains and you've done!

Ho sistemato la catena sul tavolo e ci ho poggiato sopra il bottone. Come potete vedere il bracciale sembra già fatto! Misurate il polso e tagliate la catenella in pezzi della stessa lunghezza. Legate il bottone alla catenella con un pezzo di filo metallico. Inserite la chiusura e schiacciatelasulle catenella. Avete finito!


what i did to make the clasp: I cut 2 rectangular pieces from the cap then I pierced it using a nail. I used a hook  to connect the chain to the metallic plate an then i pressed it down using a pincher.
Come ho fatto a far la chiusura? Ho ritagliato due rettangoli dal tappo e li ho bucati usando un chiodo. Con dei gancetti ho connesso la lamiera alle catenelle e ho poi schiacciato la lamiera con la pinza.

Saturday, November 5, 2011

DIY idea: soft knitwear


Impalpable as dandelions they are called mohair,cashmere and angora. They are the softest and warmest wools; soft at touch and incredibly light at sight. Looking at these jumpers they look like made of cotton candy. Angora is for sure the longest and most expensive yarn and gives to jumpers a halo of softness. Can you guess who is the animal sheared to obtain this natural fiber?


Impalpabili come  soffioni si chiamano mohair,cashmere e angora. Sono le lane più soffici e calde che si possano acquistare con una morbidezza al tatto anticipata da un incredibile leggerezza alla vista. A guardarli questi maglioncini sembrano fatti di zucchero filato.
L'angora è sicuramente la fibra più lunga e costosa e conferisce alle confezioni un'aura di morbidezza.
Sapete da quale animale si ottiene?


 When I think of an angora jumper this is exactly the look that comes into my mind: a 50's retro look, a cropped top worn over a pencil skirt; along with this pic I found Johanna's blog, I love her retro style, check it out.

Se penso ad un maglioncino d'angora è esattamente questo il look che mi viene in mente, retrç di ispirazione anni 50, un maglioncino corto indossato su di una longette. Ho trovato questa foto casualmente ed ho scoperto il blog di Johanna, adoro il suo stile vintage, date un'occhiata al suo blog.


Here is the fluffy animal that "produces" angora yarn, it is sheared every three months. What animal is that?
Hard to guess under all that fur: it's a rabbit!
Mohair is obtained from angora goats.
Today I bought a few balls of mohair in mint green to make a soft sweater: 8 balls of wool or 400 grams will be enought for a sweater and you can knit it with 3.5 or 4 knitting needles.


Eccolo qui il peloso animaletto da cui si ricava l'angora, viene tosato ogni tre mesi. Che animale è? Difficile a dirsi sotto tutta quella massa di pelo ma è un coniglio!
Il mohair viene invece ricavato tosando le capre d'angora.
Oggi ho acquistato dei gomitoli di mohair per ottenere un soffice maglioncino e ho scelto un colore pastello,menta chiaro. 8 gomitoli o 400 grammi saranno sufficienti per realizzare il maglione che lavorerete con ferri 3.5 o 4.


Tuesday, November 1, 2011

DIY idea: message mask

outside Mulberry show via Street Peepers

A giant and funny eyemask for those who like to draw attention. It can be done cutting the shape out of a plastic sheet. Once it's ready you can attach an elastic to it or glue it over a pair of sunglasses.

Per chi non ha paura di osare ecco una mascherina che riporta un messaggio. Per realizzare questo accessorio sopra le righe vi basterà ritagliare una forma da una copertina in plastica. A questo punto potrete legarci un elastico o incollarla su un paio di occhiali.
Saturday, October 29, 2011

Cut out shirt tutorial


Here's the shirt tutorial. I took a real man shirt and then I pinched and pinned it around the waist to make it more fitted. You can choose any shirt and then follow the 3 steps to cut it out.

Come promesso ecco il tutorial per realizzare la camicia con inserti in tulle. Io ho traformato una vera camicia da uomo e ho creato due pence sul davanti per renderla più avvitata. Voi scegliete la camicia che più preferite e seguite i 3 step per trasformarla.


Wear you shirt and mark out with a pin where you want the see throught part to begin. Lay down your shirt and make a loose stitched  line that will help you to cut straight.

Indossate la camicia e appuntate uno spillo sul davanti per segnare il punto da cui iniziare a tagliare. Partendo da lì fate un'impuntura da parte a parte che vi aiuterà a tagliare dritto.

 Cut the shirt : start from the front, go around the shoulder and down to the botton line. Leave 1 cm of fabric around the edge and then fold that edge to obtain a neat border.

Tagliate la camicia: cominciate dal davanti, proseguite intorno alla spalla e poi tornate giù intorno la linea dei bottoni. Ricordatevi di lasciare un 1 cm di stoffa intorno all'area tagliata. In un secondo momento piegate quel bordo ottenendo così un orlo ben rifinito.


Reverse the shirt.
Take your light weighted tulle and pin it over the edge of the cut part.
The good thing is that you don't need any pattern, just pin the tulle on and pay attention that the tulle is well stretched out.
Now sew the tulle on the shirt, cut the excess tulle around the edge and you've done!


Mettete la camicia a rovescio.
Prendete un tulle molto leggero e appuntatelo con degli spilli sulla parte tagliata.
Non vi servirà alcun modello fate solo attenzione che il tulle sia ben steso così non farà pieghe.
Cucite il tulle sulla camicia e tagliate quello  in eccesso ai bordi e avete finito!
Friday, October 28, 2011

Man shirt makeover


Many winter looks are inspired by men style. What better than a classic man shirt to jump on seasonal trends? I spent this week examining minutely this piece of wardrobe and at the end I couldn't resist giving  it my own twist. There are many beautiful details in a man shirt: the stiff collar and cuffs,the button line so I thought it would be cool to emphasize these details and make them pop out of the shirt.  I cut out a piece from the front of the shirt and I subsituted it with a very light weighted tulle. I think I obtained a masculine look with a feminine twist, what do you think of the result? Tomorrow the tutorial!

Read the Cut out shirt tutorial now


La moda invernale si ispira al guardaroba maschile. E come non scegliere una camicia classica per interpretare il trend di stagione? Tanti sono i dettagli che rendono speciale la camicia : il colletto rigido, il bordo con i bottoni allora perchè non metterli in evidenza e farli risaltare? Ho ritagliato parte della camicia e ho sostituito il cotone con del tulle leggerissimo ottenendo così un effetto trasparenza che rende il look si androgino ma con un twist femminile. Che ne pensate? Tornate domani per il tutorial!
Saturday, October 22, 2011

Versace inspired jeans DIY

DIY jeans
white altered blouse (a diy in progress)

I've been dreaming about a micro studded cloth for a while but the idea of inserting each mini stud by hand was just unrealizable until I found these "beads in a bottle" (doesn't it sound like something came out from Wonderland?). It's a gummy product you can squeeze onto fabric and that makes a ball that looks like a bead.  I found my "micro studding machine"! I picked the metal colors series and I started "to stud" a pair of black jeans. The inspiration is Versace. I decorated them around the lateral seam with the greek fret then I added a spiral on the front.

Ho sempre desiderato possedere un abito decorato con mini borchie ma l'idea di applicarle manualmente una ad una era semplicemente non realizzabile fino a quando ho trovato una ragionevole alternativa: perline in bottiglia (dal nome sembra un oggetto proveniente dal paese delle meraviglie). E' un prodotto viscoso che può essere applicato sulla stoffa e forma una pallina dall'aspetto di una perlina: una perfetta "macchina borchiatrice"! Ho scelto il prodotto in colori metallici affinchè la perlina sembrasse una borchia. L'ispirazione è Versace, ho decorato i pantaloni con una greca intorno alla cucitura laterale e ho aggiunto dei decori sul davanti.


a life size view of the pattern I drew, the grid step is 1 cm wide
il disegno della greca, il quadretto è largo 1 cm
I drew the pattern onto the trousers with a chalk
ho disegnato la greca sul pantalone con un gessetto
the studding machine gun is armed
 la "borchiatrice" armata e carica
 the first studs
le prime borchie
the spiral: finished and dried
la spirale finita ed asciutta

If you want to decorate smaller areas rhinestuds are a good alternative to "beads in a bottle". They are small metallic studs that can be ironed onto the fabric, you can buy ready to use decorations or loose ones.

Se volete decorare aree più piccole le borchiette piatte sono una valida alternativa alle "perline in bottiglia" . Si incollano sulla stoffa stirandole e si possono acquistare in merceria interi decori già pronti o sfuse.

A special thanks to Beth Livesay and Stampington for sending me a bag full of these special beads for my fashion experiments. Visit Beth's blog: Couture over Coffee

Un ringraziamento particolare a Beth Livesay e a Stampington per avermi mandato un pacchetto pieno di "perline in bottiglia" per i miei esperimenti di moda. Visitate il blog di Beth: Couture over Coffee.

my stock of liquid beads, still plenty left for my future projects
Thursday, October 20, 2011

Matter Of Style 1st anniversary


It's been a year ago since I started to post daily on this page and to celebrate the blog first birthday my mom and my sister surprised me with this beautiful cake! Isn't it fantastic? They baked it! They added so many details! It was almost too beautiful to eat be eaten but when we sliced it was delicious too! To put myself in celebration mode I lit up the candles over my nails.

E' passato ormai un anno da quando ho cominciato ad aggiornare giornalmente questa pagina e per celebrare il primo anniversario del blog mia sorella e mia madre mi hanno fatto una dolcissima sorpresa preparando questa fantastica torta in stile Matter Of Style! Superata una certa esitazione nel tagliarla si è rivelata tanto buona quanto bella! Per interpretare lo spirito della festa ho acceso tante candeline sulle mie unghie.


Ready? Blow!
Tuesday, October 18, 2011

DIY idea: paint your brogues


Vans trainer shoes

These shoes are trainers dressed like brougues. These are sold by Vans but hey wouldn't be cool to transform our trainers into brogues using a sharpie?

Le scarpe di Vans sono delle trainer travestite da brogues. Perchè non trasformare anche le nostre tennis in scarpe british utilizzando un pennarello permanente (o per la stoffa)?
Related Posts Plugin for WordPress, Blogger...

Popular Posts

Total Pageviews

My Zimbio My Ping in TotalPing.com

About Me

My Photo
Youth Pangkahkulon
View my complete profile